Showing posts with label germination. Show all posts

Thursday, January 22, 2015

Victory!

https://www.youtube.com/watch?v=-YCN-a0NsNk

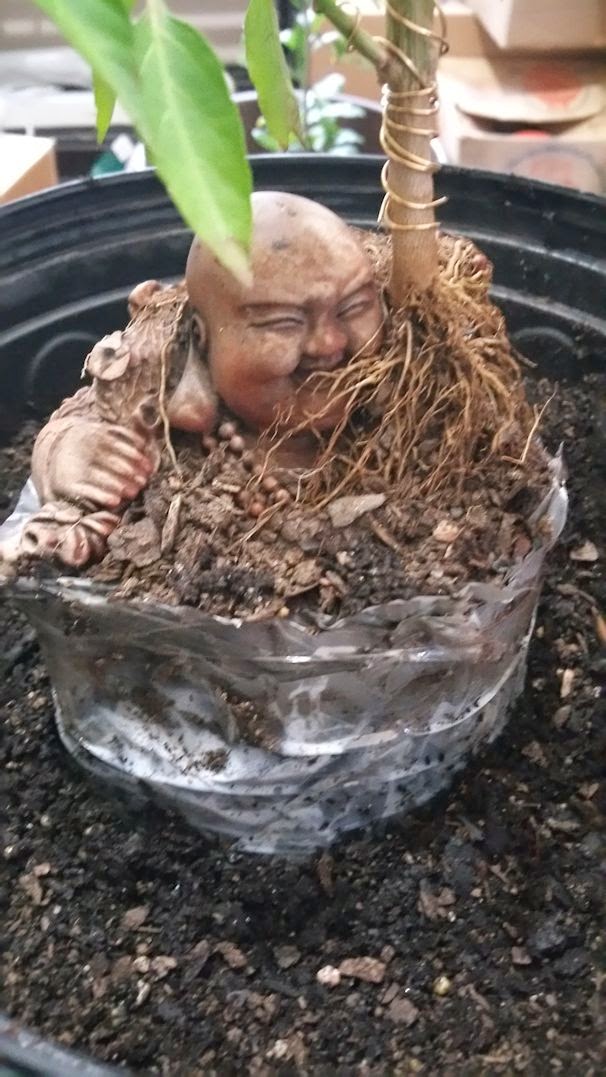
And since I'm officially in a "I want to do stuff" mood, I decided to go ahead and do the pulldown on the Laughing Peter.


Dug about as far down again as I had the first time, trimmed off the plastic, and using a spray bottle full of water carefully removed the soil.  As you can see, there was a pleasant surprise in how several good sized roots have wrapped around Buddha's belly.  Always a good sign to have big fat roots this early, especially onces that are nicely hugging the "stone".

While I was at it, I also removed the wiring, as I saw at least one spot where it was just beginning to bite into the trunk.  So far I'm quite happy with how this one is turning out, and its great practice for the Reaper on the skull in a few months.

Wednesday, January 21, 2015

Death is in the House!


Death makes a house call!

Okay, the AeroGrow thing was a waste of money, it couldn't do jack.  My homemade one that I threw together for less than half as much in parts?  Well, I'll let results speak for themselves.


That is one genuine (I hope) Carolina Reaper.  Checked the other slots, and all of them had germinated.


So, since I've got 4 sprouts now, I've gone 4 different ways with them.


For the first one, I put sponge and all into some potting soil, watered well, then covered the top with dry potting soil.


 One of the others I transplanted into a small starter cell still attached to a piece of sponge, but not the entire thing.  Another I removed from the sponge entirely and put into soil.  The third I am leaving in the bubbler to see how it does with hydroponics.  I figure I'll see which ones do the best, and which ones do more poorly, and use that information in the future for raising young nuclears.

Since they've all germinated, I've taken the heating fan out from under the cabinet (they need high temperatures to germinate, but will grow just fine at room temperature), and turned on the overhead PC fans.

Had some trouble with my fancy digital power strip, so I've replaced it with something better in the long run anyway.  Two mechanical timers.  That lets me have the lights on a 16/8 hour cycle, and the fans and bubbler on a 30/30 minute cycle.  Lights are on from 8 am till midnight, while the aerator for the bubbler and the PC fans are alternating on and off every 30 minutes.

Everything is officially at full power go time mode!

Wednesday, December 31, 2014

First Germination

I've been watching these baggy seeds like a hawk after an accident with the one in the soil (ahem, some alert readers may have spotted my cat in the background of some pictures, three guesses what happened), and although it doesn't really show up too well in this photograph, I do believe its reached the point where it has actually germinated, but not yet split the seed casing to send out roots and stem.


If I'm right, and I think I am, this is the perfect time to transfer the seed into some soil.  No delicate bits hanging out to be damaged by the move, and pushing up through the rough soil helps remove the seed case.  So, time to sterilize some soil!

Now, people will tell you all sorts of things about sterile soil, and it is very helpful to have it.  Thing is, lots of those people will recommend buying it that way or using some kind of inorganic mixture, and I don't like that.  Sterilizing regular old potting soil is quite easy.  I just put a bowl full of soil in the microwave for 5 minutes on high.  That much heat will kill anything, and you know you're good when you take it out and your dirt is literally steaming like a bowl of soup.  Smells like a potato when you microwave it too, makes me kinda hungry.  After I take the soil out, its fairly dry, most of the water having boiled off.  So, to prepare it for seeding, I wet it back down.  With hydrogen peroxide.  Anything the heat doesn't kill, the peroxide will.  Any buggers that can survive that double whammy deserve to have their fair shot at my seedling, they've earned it!


Anyway, the container of choice at the moment is this self watering herb container I got a couple years back.  The clay pot has no drainage holes in it, but is unglazed.  It sets into a larger fully glazed container that holds the water.  The raw fired clay of the inner container absorbs water and then transfers it inside, kind of like a chia pet in reverse.  It keeps the soil inside at a nice slightly moist level at all times without having to pour water directly on the seedling.  Little roots are easy to damage, so you don't wanna wash the poor thing away.


And for now we have a temporary setup ready to go.  Looks like I had better spend my day off tomorrow cleaning out a spot for the cabinet, I just might be needing it here very soon!  Its fully painted and ready to be reassembled, I just gotta make room for it, and I think anybody can understand my having put off cleaning the junk room!