Showing posts with label moss. Show all posts

Tuesday, December 1, 2015

Moss Test Grade: C-

Okay, its been a little over a month since I started the moss test, and I think the results are in.


Despite daily spraying from the bottle with rain water, the moss is looking pretty... autumnal?  Is that a word?  Spellchecker thinks it is, so I'm going with it.  Yeah, it looks more dead than anything else.  Its not entirely dead, as you can still see green underneath the top layers on the soil surface, but it seems the dry indoor air and the fans in the top of the case make it just too dry for it to thrive.

So, verdict overall is a C-.  Its not a complete failure, but its not very good as a permanent fixture either.  For a short term thing though, it looked great!  I'll be sure to give it fresh moss when I dress it up for final show-off pictures.

On a related note, the cultured moss I brought inside is also suffering from dry air, though I have been keeping it in soggier soil so its done better overall.


Same dead extremities, but a much greener under story.  I decided that since its rainy and fairly warm out for the time being, I'd put it outside with the stuff I left out there this whole time (and give it a good soaking of rain water).  The comparison picture here tells the story, IMO:


What I've had indoors is struggling, but is much darker green.  The stuff that has been outside is thriving, but is a much lighter, almost neon green.  Tells me I probably haven't given the indoor stuff as much light as it would have liked, along with the indoor heat and air making it too dry for it.


Anywho, I dug the mostly dead moss out of the skull.  I was kind of hoping that maybe the moss would hold enough moisture to encourage some new roots into the eyesockets from the pepper, but that didn't happen.  Just didn't stay damp enough for long enough at a time, so oh well.


But as you can see, the peppers are loving the conditions in the box.  I gave them a feeding about a month ago with some miracle grow mix (they've been in these containers for a while now with nothing but what was in the leftover soil), and I didn't want them to go hungry on me.  Nice dark green leaves mean happy peppers!

Friday, November 13, 2015

Just Veggin' Out

Not much to report on at the moment.  Just letting the plants be plants.


It is interesting to note that this is the first time my grow cabinet is being used for it's intended purpose.  I built it last winter, but all it ever got to do was sprouts.  This time the moveable shelf is all the way down and it has full sized plants in it, and it has been working great.


You can see that after the trimming for the aphid problem last month it has really started bushing out very nicely.  Thats the goal of this winter, to get a nice shaped canopy going.  The project Reaper has been aphid free for a while now, but the zombie Reaper had a small outbreak of them again just this morning.  Another round of neem oil for everything in the box!  Spray it on the leaves, the soil, everything.


The moss test I started last time is doing... okay.  I wouldn't say its thriving by any stretch of the imagination, but it is still alive.  Its been getting regular hits from a spray bottle to try and keep it moist without waterlogging the pepper.


Also happy to report that there has not only been no further loss of roots, but that we pretty clearly have some very nice fattening up of the roots we have left.  One of the reasons I've been keeping this blog is so that I can go back to past pictures and compare progress, since to me just looking at it the progress is so slow it feels like its the same as it ever was.  But going back and looking at some of the pictures from early August, I can definitely see that the roots are a little thicker now.

Its subtle, but its there.  It'll be another year or two before its really night and day difference, but things are turning out quite nicely (and a year or two for a pepper bonsai beats the hell out of 5-10 years for an actual tree bonsai!).

Heh, I'd like to see anybody else get this kind of progress out of a bonsai in less than a year using a "traditional" tree!

Tuesday, October 27, 2015

Moss Test

Okay, since the aphid problem is under control now, I decided to move in to the next stage of testing.  I've been growing some fern like moss for the final display, but I wanted to mess around with the stuff and see how well it would survive.

So, first step was to go harvest some more of the moss to avoid killing what I've been tending all this time, and mix up some mud.


I didn't think to grab the camera while I was mudding up the surface of the soil, but I think you can figure out "put a thin later of mud on the top of the soil and gently press the moss into it".  I did think to grab the camera after I muddied up the skull itself though.  Idea here was to get the fine mud all over the skull, push some moss into it in strategic places, and then wash it off by simply pouring rain water over the top of it.


Now, do I know if this is all going to live (the moss, that is)?  Nope, I honestly don't.  However this moss grows wild out in my back yard at the treeline, so I figure it should be pretty hardy.  The main issue is going to be that moss likes being damp, and the pepper doesn't.

So, I'm going to use this as a chance to test how much drying out the moss can take before it shrivels up, and if a hearty misting will perk it back up without keeping the soil damp for the pepper.

It also serves as a great excuse to see how the finished thing will look, and that bottom picture there looks pretty damned awesome, if I do say so myself!

Tuesday, September 29, 2015

Almost Halloween Season Hack 'n Slash


The project Reaper has been doing well.  Nice and green from a late feeding, even was trying to set some new pods.  Now its entirely too late in the season to be worrying about pods, and going into October the weather becomes much more unpredictable.  Its pretty warm now, but I've known it to snow in mid-October before with very little notice, so its time to start working on actual bonsai chops!


And bam, by the miracle of editing, the chop has been completed.  From here on out, the focus on it will be developing a canopy.


Because as you can see the roots are doing very well.  Even the moss is surviving nicely (and I'm digging how it makes the eyes and nose almost glowing green).  I'm not quite this use to this many things going right, I keep waiting for the other shoe to drop. ;)


I've also gone ahead and chopped the backup plant down pretty hard.  Made sure to spray the cut ends on both this and the project reaper with peroxide to help keep it from developing that lethal fuzzy white fungal infection, and I'm hoping that between that and the large intact root system on it right now will be enough to pull it through.  It ended up making for a fairly neat open center design, so I can definitely work with this.  I mean, if it dies, it'll be disappointing, but it won't be end of the world.  Project Reaper is good, the Zombie Reaper is good, this one would just be a bonus.

Thursday, August 27, 2015

Back in the Saddle

Well, I had a wonderful week and a half there with a dead computer.  How was yours?

Anyway, back up and running, so time for some updates!


The amount of moss I've been able to grow so far has been insufficient for my needs so far (told you this stuff grows slow!), but I found a great big patch of the stuff ready to go.  So, I cheated and harvested the moss I'll eventually use.  Put some of that fine clay mud I gathered last year in a pot base and grabbed enough moss to make a full ground cover when I need it later in a month or so.


Here, along with the fact that I need to cut the grass, we can see that the chop I did on the project reaper has created longs of nice new growth.  All is well there.  However, all was not well when I measured how big the bonchi was in that old green pot and compared that to how much space was available in my grow box.  Its too tall to fit comfortably, and the other night it actually got down into the high 50's so I figured that since I was going to have to bring it in anyway, I might as well repot it into an overwintering container.


Luckily, I already had this plastic faux half wine barrel style pot laying around.  Its about half as tall as the green one was, but still deep enough that I could have some dirt underneath the "neck" of the roots from earlier.  So, still gives it some room to grow in.


Still looking good, and I won't have to worry about repotting anymore, its fully ready to come inside when the weather turns cold on a more permanent basis.  Now, high 50's wouldn't have killed a pepper, but this one at least I don't want to even have a slow-down, so anything under 60 and it comes inside.  And if you're wondering, the green thing is an ant bait plug.  Had some small little ants living under the green pot, and just wanted to make sure that they didn't stick around long enough to cause any problems.


Minor update, the Cumari started showing signs of leaf yellowing after all the heavy rains we had (combination of being in a small container and lots of rain, wet dirt and nutrients being flushed out), so it got repotted into the same pot again with fresh soil and some fertilizer.  The roots on it were looking really good, so I went for a pretty big pulldown on it.  Doesn't seem to have minded one bit.

On a sadder note, the Buddha bonchi is pining for the fjords.  It has ceased to be.  Its dead, Jim.  Oh well, it was a fun diversion, but it didn't really get the good root development I wanted for a long term keeper.  C'est la vis.  It's soft parts went in the composter, and it shall help nourish the next generation.  Ashes to ashes, dust to dust.

Tuesday, August 18, 2015

Branching Out

Couple days ago I gave the project reaper a chop to encourage some growth lower down on the main limbs, and as you can see new growth is exactly what is already happening.


Now, this is where I need to keep an eye on it.  The plant is going to try and put out new growth all over the trunk, which can include places where we don't want it.  A sharp eye and regular inspections will let you catch buds forming in places you don't want, and then you can just scrape them off with your fingernail.


The earlier you can catch and remove unwanted growth, the better.  The reason being that the larger a branch becomes, the greater the scarring that will result when you remove it.  You know that knothole in the main trunk (which you can see in the above picture)?  Thats from where I removed a limb that would have obstructed the view that I removed months ago.

Sure, it gives us a nice, well placed knot hole now, but we don't necessarily want that kind of thing up on the limbs.  So, pinching off new growth that is too close to the trunk now saves us headaches later.


And gotta say, this rainy, drizzly weather is doing wonders for the moss.

Thursday, August 13, 2015

Pulldowns and Moss

Went out for some early morning watering and took a look at the root I had repositioned between the teeth, it hadn't taken after all this time, so I removed it.  Kind of sad to lose the one that was curling into the nasal cavity, but if it wasn't taking after all this time it wasn't going to, and it would have eventually just withered away.  Plus, that was the main thing holding me back from doing a pulldown.


You can't see in this picture, and can really only feel when you're touching it, but the top of the teeth on the lower jaw are now above the soil line.  We're getting into the home stretch here people!


That root ball on the side still has me confused.  It seems to have formed over the outside of the mandible joint, but I still can't really tell what its doing.


And if you were sharp eyed in that first picture, you probably spotted the green.  Since I had to lose the nose root, I decided to try giving it some carpet moss starts in the recesses.  Some in the nose, the backs of the eye sockets, and partially visible back up in the first image, around the base of the trunk.

I don't know if any of these plugs will take, but hopefully they're in sheltered enough areas that they will retain some moisture and be able to grow.  This is a different kind of moss than I'm growing as a soil cover.  That moss is more fern like and leafy, this stuff just forms a thick dark green carpet.

Since this moss is really slow growing, it should lend a great air of age to everything if it takes hold.

Saturday, August 1, 2015

Rolling Stones Gather No Moss


I said I was going to wait a little while longer, but I got to thinking that the longer I waited to thin out some of these roots the worse the scarring was going to be, and the greater the chance that one in a bad position would choke out one in a good one.  So, did some root pruning today.  This is one of those times where less is more.  We get a much more visually appealing result by removing some of that root mass than we would have had by keeping it all.


After I was done, I found some roots with slack and some previously empty areas of the skull (like the space behind the cheekbones) that hasn't had any soil in it, so I pushed the slack roots into those crevices and then packed them full of damp soil.  While I have some vain hope that maybe it'll encourage them to put out more roots in those areas, in reality the soil will dry out in this heat far too fast for it to do much in the way of new root growth.  But they will help keep the roots I pushed in there in place long enough for them to fatten up and hold that shape permanently.


As some of you may remember from last year, I collected some moss starts from out in the woods that I can use in the final project as cover for the bare soil that won't send down invasive roots and threaten to choke the pepper out of it's limited bonsai pot space.

Since moss takes no nutrients from it's substrate (the stuff it grows on), it is VERY slow growing.  I mean, this is seven or eight months of growth (and about half of what I currently have).  Much like the bonchi itself, it takes a lot of time and patience, but the payoff is worth it.  The hope here is that when the bonchi is done, I'll have a nice thick sheet of this moss already attached to this pliable mud that I can use to make a shell around the actual bonsai soil underneath.  And since its moss, I can just mist it with a sprayer on a regular basis to keep it green and happy without having to worry about overwatering the pepper.

And lastly, an update on the Cumari.


It had a small pulldown today, mainly because these little ornamentals don't grow long deep roots very quickly.  But You can see the plant is healthy and happy, and that we're finally seeing dominant roots appearing.  Which actually is one of the main indicators for this one as to when to pull down, I didn't want to do so when there wasn't signs of good strong roots.

And on the off chance that anyone is wondering why the soil is always sopping wet when I take these pictures, its because when I do pulldowns in containers I typically dig a trench around the plant about twice as deep as I want the pulldown to be, then use water to pour over the top and wash the excess dirt down even.  Much less traumatic to the plant that way than trying to dig it all out by hand.

That and usually I'm out watering things in this near 100 degree heat and checking in on them as I do it, and then if something interesting is going on I finish up then go inside to get the camera.

Thursday, December 4, 2014

Better Living Through Better Moss

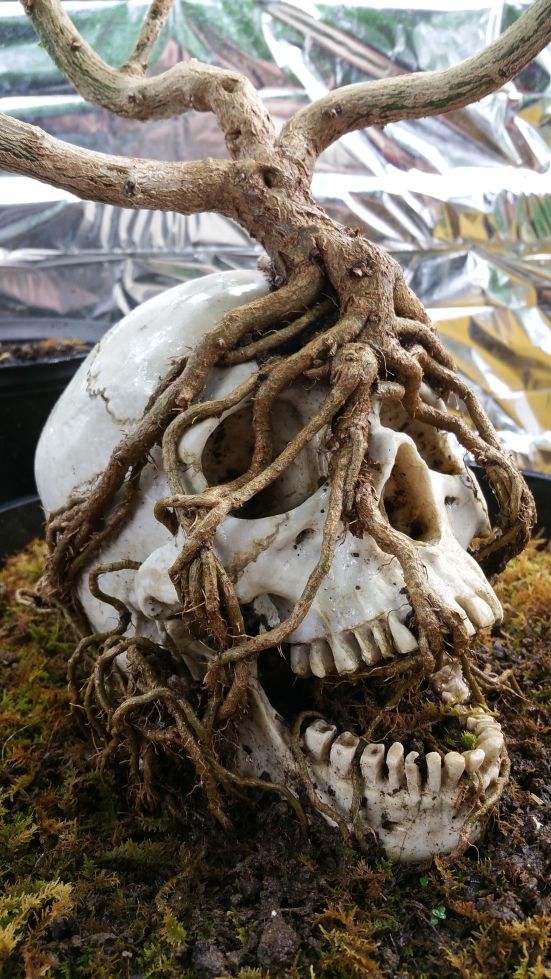
I was out hiking in my woods today after work since the weather is so nice, partly for the exercise and partly to gather raw materials for the bonsai.

See, I want to grow moss to put over the soil around the skull, and one of the best ways of doing that is with what the bonsai community calls "keto-tsuchi", or what we down here in the American south call "muck".  As you may have figured out from the name, its basically just smooth mud and, well, muck.  Lots of fine grain organic matter, clay, you know, the stuff that if you stepped in a big deep patch of it while out hiking it would suck the boot right off your foot.  Now luckily, I have several streams on my property which means I've got ample amounts of stream bottom silty muck for the taking.

To turn that into some proper bonsai keto, what I'd want to do is add some dried sphagnum moss to it, maybe a little perlite, basically turn it into something akin to concrete.

The reason I would want to do this is that a good bonsai soil mixture tends to be gritty and aerated, which is good for the tree.  A good moss likes a growing surface that is smooth and dense that retains water well without moving too much.  Pretty much the exact opposite of what the bonsai wants.  Now, given enough time a good moss can grow over a gritty surface, but its difficult and slow.

Thats where the muck comes in.  Mix up some muck and you can make a type of thin clay layer on top of the grittier soil that is water permeable that moss loves, without screwing up your soil underneath for the tree (or in this case pepper).

So, I went a hiking to see if I had some good stream bed silt I could harvest, and yup, found plenty of it as I knew I would.  But in addition to that, I found this...


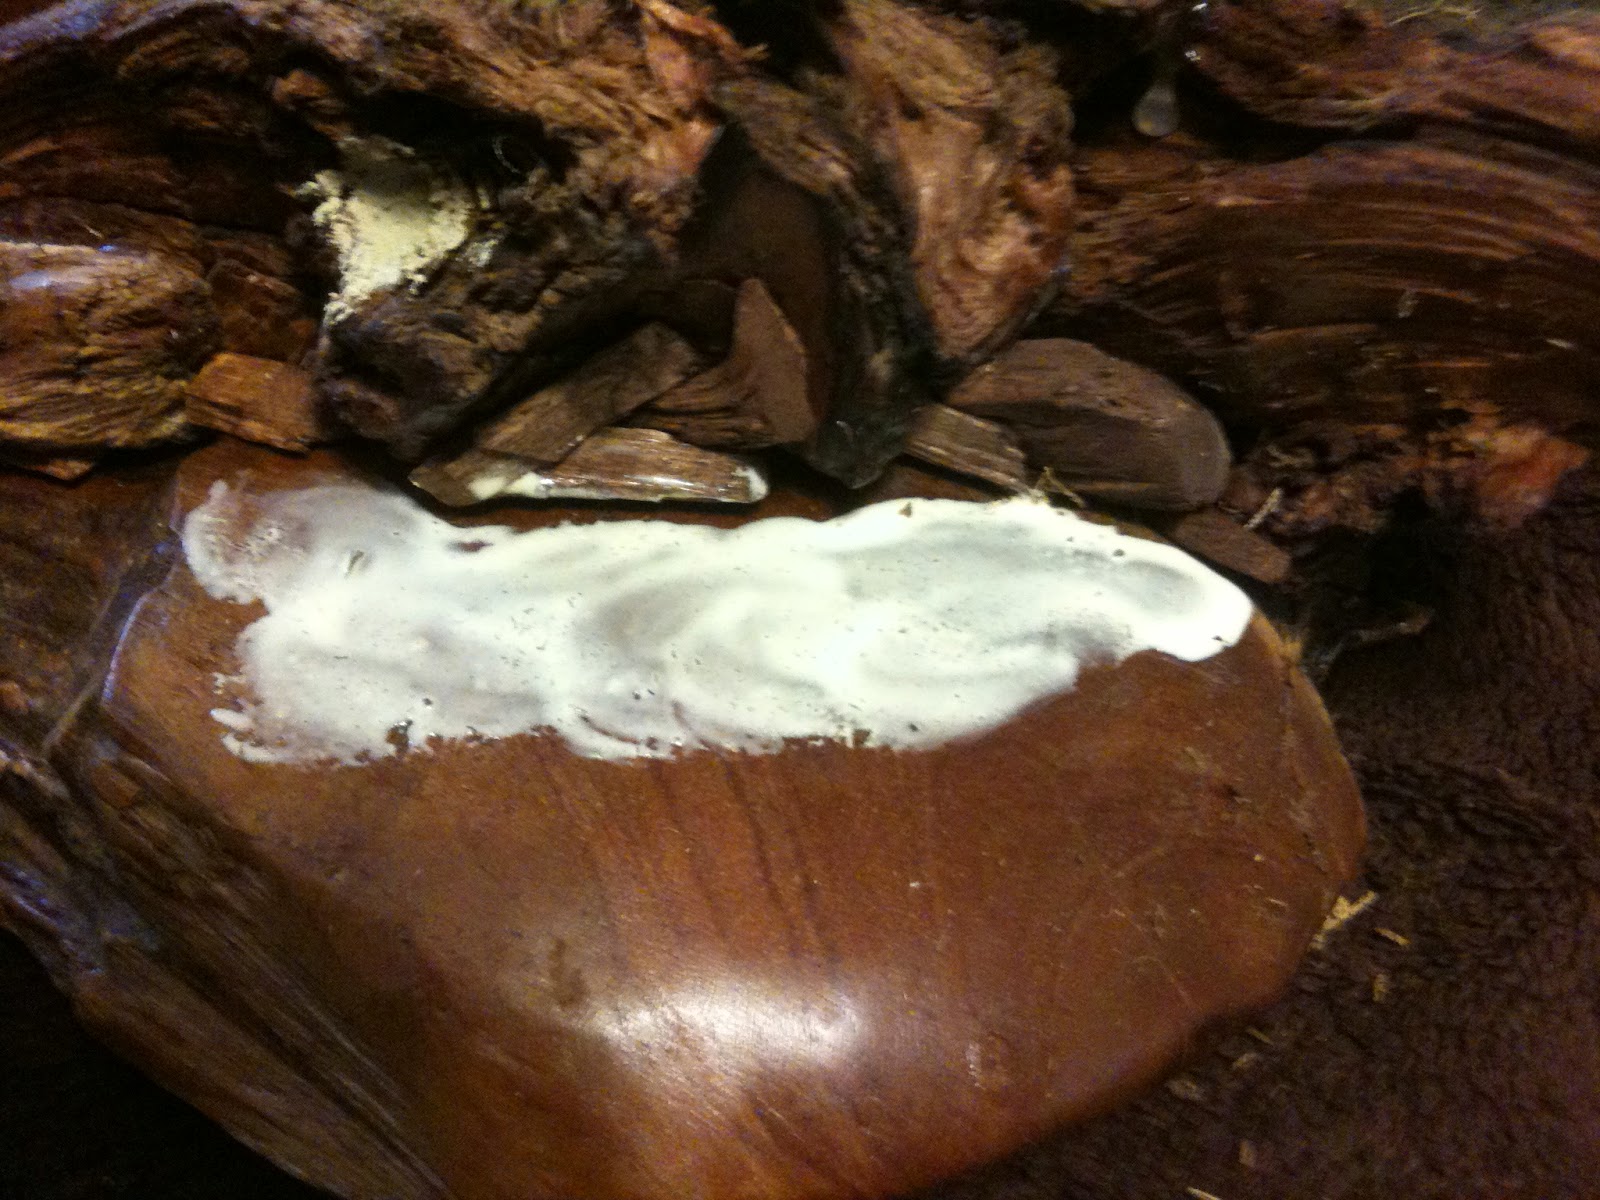
Now normally the only mosses I see around here are... well I don't know the names of the various mosses out here.  Before I got into bonsai I never had a reason to differentiate between them.  Its mostly this:


and...


...this stuff.

That second one (which took me forever to find a picture of on the internet now that its too dark outside to just take a picture of whats growing in the driveway) is what I harvest some of last week to start growing, but its not really ideal for this project.

Then I found the patches of the fern like leafy stuff in the first picture.  This is the same stuff (or at least extremely similar) I bought  dried in a bag to decorate the sides of the pot with, and here's some good living colonies right in my own (extended and heavily wooded) back yard.

Needless to say, that is the perfect stuff, and I cut my hike short and ran home to grab a shovel and the nearest suitable lightweight transport container I could get my hands on.  Which turns out to be...


...the turkey roasting pan from Thanksgiving.

Dug up some of the muck dirt from the mostly dried up stream bed a dozen or two feet away, filled the roasting pan, and then harvested some chunks* of the moss to seed it with.

*Note: Be kind to mother nature, never harvest an entire outcropping of moss, just take some pieces from any given spot so that it can regenerate easily.

Got home, transferred to a better container (never use metal containers), poured some rain water in there to get it nice and moist, and set it under the carport where it would get partial shade but still have decent light.  With any luck, I'll not only have the muck to cover the top of the better bonsai soil with, but it'll already be covered in a layer of matching moss to the container.  Perfection!

(Side Note: I could probably take the dried moss I have, soak it in water, and have spread it out in the soil as well.  While that moss is dead, odds are its full of spores that would germinate fairly easily.)

This is the key to making really awesome stuff.  Just get the basic idea of what you want in your head, and then just walk around with your eyes open.  More often than not, the perfect things you would never have expected will just fall into your lap.

Wednesday, December 3, 2014

And I'll Form the Head!

Finally had some dry weather to seal the bricking up and start final assembly of the container.


As you can see, I am using deck screws in the pre-existing holes in the driftwood (check back a few posts and you can see I got the pieces strung like a boa).  Forget glue, I'm holding the top of this thing down with good old fashioned steel.


Three deck screws in a triangle, each covered over with some wood putty that I can later paint to better match the wood make those nasty shiny screw heads go away.


And while I had the wood putty out, I went ahead and sealed up the inside gaps with it.  I'm not overly concerned about this part looking pretty since it will be below the soil line, it just has to be functional.  Once its thoroughly dried, I'll go over it with some sealant as well to make sure moist soil doesn't slowly rot it out.

That will be my third and final coat of sealant on this thing.  My general motto is that its organic wood next to moist soil, the ideal conditions for rot.  Better to have too much sealant (especially on the inside) and waste a layer than to not have enough and have all my hard work turn into a pile of mush in a couple years.


Since I was already working on the rest, I decided to go ahead and apply the moss to areas that didn't need any more attention.  Its pretty simple, just put some wood glue on the surface, and swirl it around with your finger to make a more or less even layer of glue, then push the moss into it.


I've got a lot of wet on here now between the moss glue and the putty, so its going to have to dry for at least a day or two before I touch it again.  Thats when I'll do final touch ups on the paint to hide the external putty, string out the moss a bit more where it looks too unnaturally clumpy, and then hit it all with one final layer of clear coat gloss enamel.

I did some test sprays of the enamel on some scrap moss and there was no visible change in it while it did stiffen it up quite a bit.  This is a good thing, as it will help make it nice and hard and hence more durable while still looking like natural growing moss.  Again, no point in doing it if its just going to fall apart in a couple years.

Then it'll be done, and I can fill it with soil and start working on skull positioning.  I'm debating on if I want the entire skull above the ground, or half bury the lower jaw so its mostly the top half of the skull showing.  I've kind of grown to like how that looks in some of the pictures I've taken for the blog here, so it'll be something to experiment with for a later post.