Wednesday, December 31, 2014

First Germination

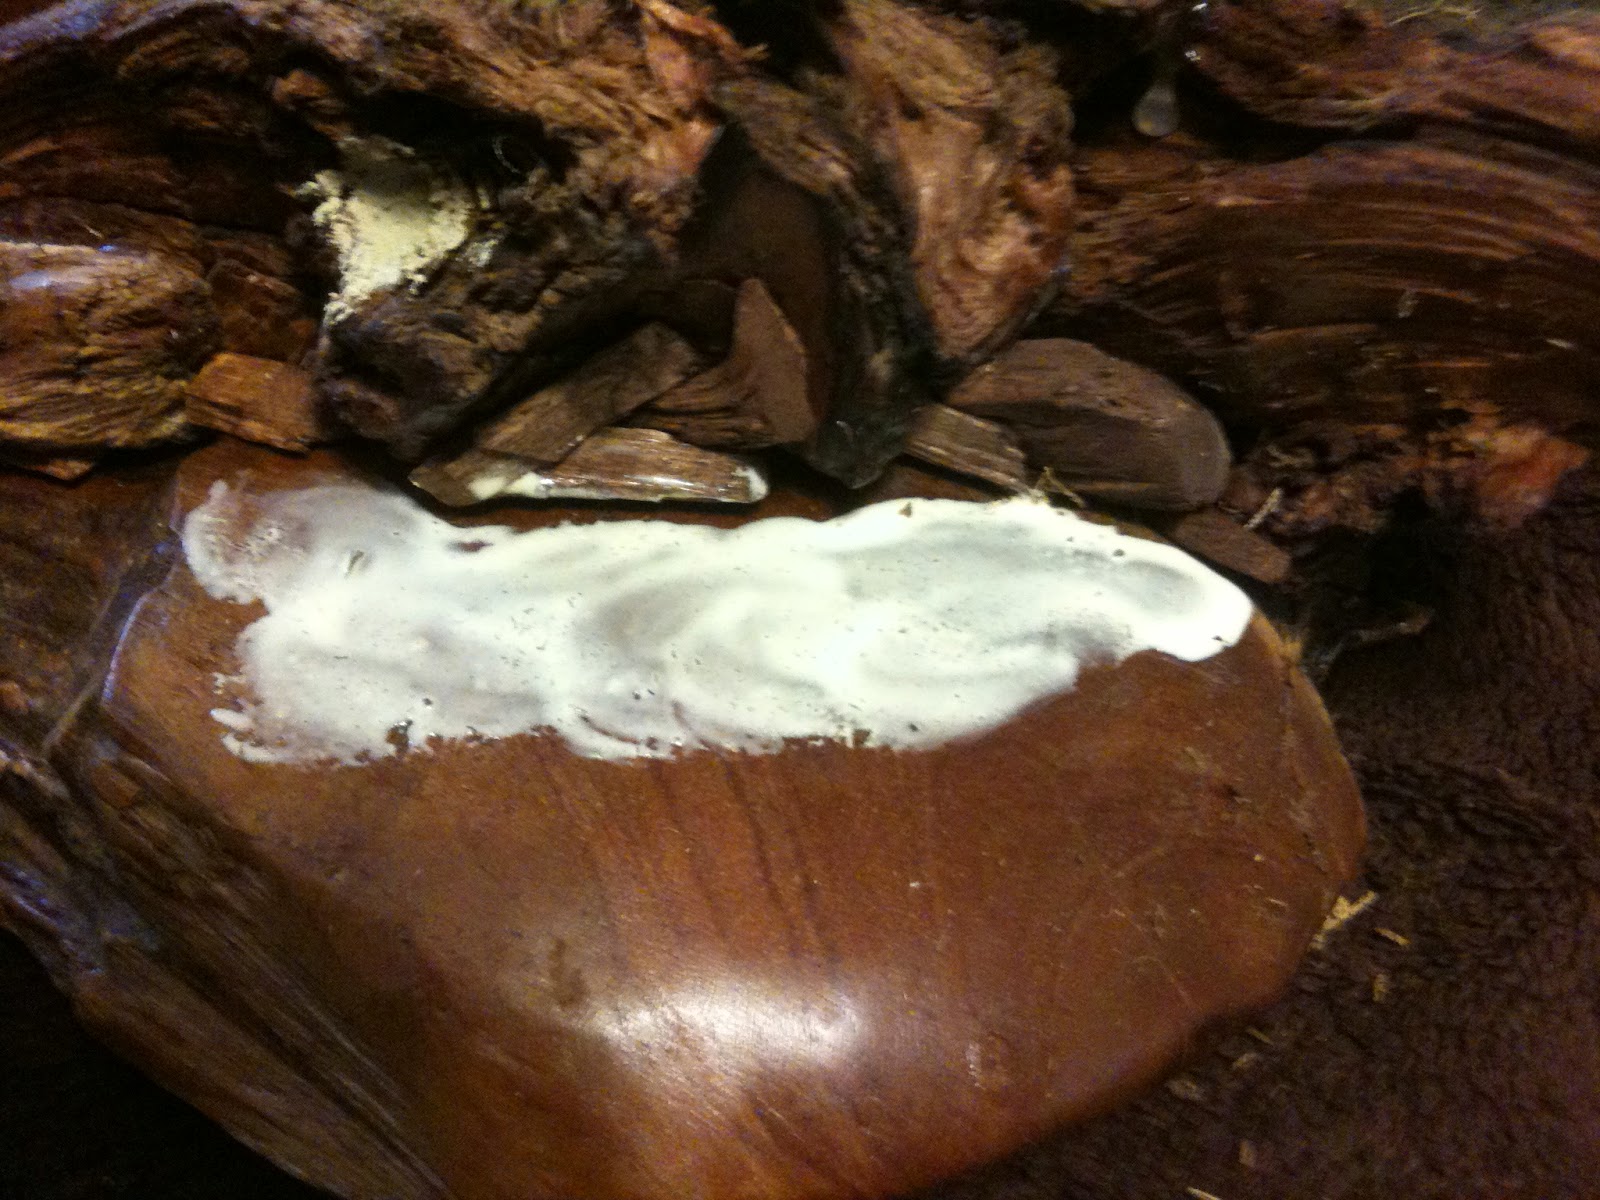
I've been watching these baggy seeds like a hawk after an accident with the one in the soil (ahem, some alert readers may have spotted my cat in the background of some pictures, three guesses what happened), and although it doesn't really show up too well in this photograph, I do believe its reached the point where it has actually germinated, but not yet split the seed casing to send out roots and stem.


If I'm right, and I think I am, this is the perfect time to transfer the seed into some soil.  No delicate bits hanging out to be damaged by the move, and pushing up through the rough soil helps remove the seed case.  So, time to sterilize some soil!

Now, people will tell you all sorts of things about sterile soil, and it is very helpful to have it.  Thing is, lots of those people will recommend buying it that way or using some kind of inorganic mixture, and I don't like that.  Sterilizing regular old potting soil is quite easy.  I just put a bowl full of soil in the microwave for 5 minutes on high.  That much heat will kill anything, and you know you're good when you take it out and your dirt is literally steaming like a bowl of soup.  Smells like a potato when you microwave it too, makes me kinda hungry.  After I take the soil out, its fairly dry, most of the water having boiled off.  So, to prepare it for seeding, I wet it back down.  With hydrogen peroxide.  Anything the heat doesn't kill, the peroxide will.  Any buggers that can survive that double whammy deserve to have their fair shot at my seedling, they've earned it!


Anyway, the container of choice at the moment is this self watering herb container I got a couple years back.  The clay pot has no drainage holes in it, but is unglazed.  It sets into a larger fully glazed container that holds the water.  The raw fired clay of the inner container absorbs water and then transfers it inside, kind of like a chia pet in reverse.  It keeps the soil inside at a nice slightly moist level at all times without having to pour water directly on the seedling.  Little roots are easy to damage, so you don't wanna wash the poor thing away.


And for now we have a temporary setup ready to go.  Looks like I had better spend my day off tomorrow cleaning out a spot for the cabinet, I just might be needing it here very soon!  Its fully painted and ready to be reassembled, I just gotta make room for it, and I think anybody can understand my having put off cleaning the junk room!

Sunday, December 21, 2014

A Madman With a Magic Box

Weather mostly cooperated with me today.  Wasn't as warm as it was supposed to be, but oh well.  Had to get this done, because its just going to get colder and wetter from here on out.

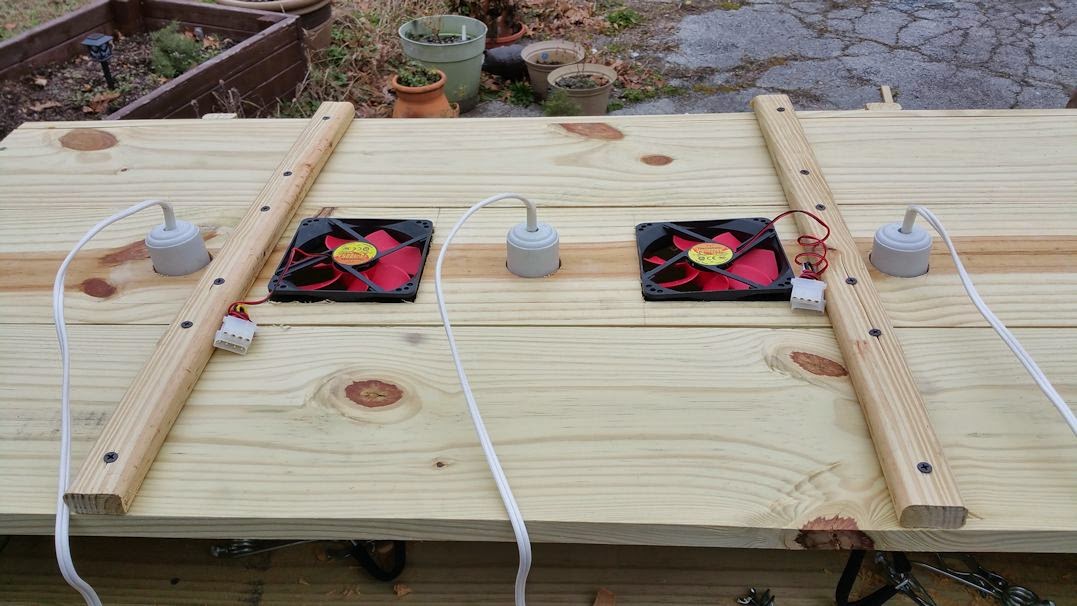
Principle woodwork on the cabinet is finished.


And as you can see, I have the sockets cut for my lights and my CPU fans.  Everything test fits in just fine.


The doors (which I just have propped against the cabinet here) had a few issues.  Mainly I thought I could get away with using fewer screws.  I couldn't.  Instead of re-positioning the screws and leaving holes, or cutting new supports (from wood I didn't have), I just said screw it, there will be some funky screw placement.  Only downside is that the hinges I bought to attach the doors with are laughably inadequate.  I need to buy much bigger, much stronger hinges next time I go out.

Seeing as how all the places that sell good hinges are in major shopping districts, however, that may have to wait until after Christmas.

Went and dug through my old spare paint to find an exterior paint to put a couple of coats on with.  Was going to just slap whatever color I found on there and then spray paint it something better as a top coat, but the can I opened happened to be...


...Tardis blue (even if it doesn't quite look it in this lighting).  Now I'm torn between if I want to follow the original plan and paint the outside something less fanboyish (inside doesn't matter, its just coated for a vapor barrier, its all getting covered in something more reflective later), or just embrace it and paint the entire thing up like the Tardis.

Either way, tomorrow after the paint is good and dry I'll disassemble it (which is why everything has those reinforcing bars on the outside, so the top/back/sides can be taken apart into slabs to make moving it into the house by myself possible), just in time for the forecast rain for the next several days.

Saturday, December 20, 2014

Making The Mold

I braved the pre-Christmas shopping rush to go out and gather the supplies I needed for making the mold that will (hopefully) be used to keep the roots in shape later in the summer.

Here's the process:


1) Tear old newspaper into strips and place them in a large container.  Add hot water and let soak for about an hour, going in and stirring/tearing/overall agitating the mixture until it turns into an oatmeal like mush.  Thats our basic paper mache pulp.  If you're impatient you can boil the water to make the paper dissolve faster, but its not really necessary.  Hot water out of the tap works just fine.


2) Outside, get the skull ready.  You'll want to make sure and cover your working surface with newspaper as well, because the insulation foam we'll be using later on sticks to *EVERYTHING* and does not come off.  The newspaper cover means it can stick to it all it wants, no harm done.


3) Encase the skull in paper pulp.  This is going to be like the clay when making a mask, if you've ever done that, only instead of being poured up in latex, this will be the cavity that will be filled by the soil and roots.  You want to make it thick enough that there's room for your soil/sand/whatever once you're ready to get started, but not so thick that the roots really have anywhere to go except for around the skull.  I think I heard a crack when I was pushing the pulp on, which means I might have broken the glue on the lower jaw.  The rest of the skull didn't clamp shut, so I don't think it was anything too bad, but I'll have to make sure and check it out and do any repairs needed once this is over.  So be gentle here!


4) Then, use your insulation foam to build up a shell all the way around the paper pulp.  This stuff cures to be very firm, and to extend the comparison to mask making, this is our plaster of paris layer.


5) After about 2 hours the foam has set up enough to start the cleaning process, but it isn't firm enough to carve yet.  That will take overnight, but its good enough that we can pull the paper pulp and skull back out of it.


I did pop the jaw back off again, but it snapped right at the glue and didn't break the resin skull itself, so thats easily fixed.

At this point, its time to sit back and wait.  Tomorrow this foam should be very stiff and ready to carve down into a more usable shape.

Friday, December 19, 2014

Name... That... Pepper!

Okay, my nameplate has been finished and someone picked it up for me.  Apparently the engravers forgot to include my screws, but nothing a trip to Home Depot for some brass screws and a few minutes with a power drill to enlarge the holes in the plaque couldn't fix.


I should have expected trouble with this.  When I placed my order (in person), they asked what I wanted it to say.  "Carolina Reaper" I says.  "C-A-R-O-L-Y-N-A R-E-E-P-E-R?" Seriously, we're in eastern Tennessee, I can almost throw a rock and have it land in South Carolina.  And how can you not spell Reaper correctly?

Oh well, whats done is done, and I have my nameplate.


I originally wanted it to have the name of the project along with what kind of pepper it was, but seriously, these people couldn't figure out Carolina Reaper (they said "I thought it sounded like some kind of tree", so I guess they were at least somewhat close), so didn't want to have to try and explain "Living Death" to them.  Claimed they couldn't get it all on one tag anyway.  I don't know what kind of hardware they have for making these things, but you'd think putting a second line on this thing would have been an option, but oh well.

Drilled the screw holes into the base, added some epoxy glue, screwed the bolts in, got it up on a table letting everything set up.  And with that, the container for the project is 100% complete!

Thursday, December 18, 2014

Lights... Camera... Action!

Okay, the grow light I ordered came in, I've got this uber camera in my new phone, and its been 2 weeks since I started that one seed and I've concluded that between not being 100% sure on this halogen bulb being the best heat source for it and just wanting something I can see more easily, I've decided to start more seeds.

First up, the new grow light along with the first high res picture of the container.  Now these I did run through photoshop (well, technically paintshop pro) to reduce the size, because damn, this camera takes crazy high resolution photos!


The LED is pretty bright, but its entirely directional.  The arc on the LEDs is pretty narrow, so only things directly under it will really get the benefit.  So yeah, glad I'm building a setup that will offer more flood filling CFLs.

As for the other seeds I'm starting, I'm going to be using the baggie method.  For those that aren't aware of how this method works, here's what you need.


1 Ziplock Bag
1 Paper Napkin
1 Seed Heating Mat
X Seeds

The basic idea is to put your napkin in the ziplock bag, wet it, put your seeds on it, close the bag, and put it on the heating mat.  The napkin serves as a wick that keeps the moisture on the seeds without being soggy, the closed bag prevents it from drying out, and the overall thinness of the setup means it all stays a consistent temperature on the heating mat.


Here you can see I've put 4 seeds, one on each corner of the wet napkin.  I specifically put them in the corners because I have successfully used this method in the past and if you don't spot just about the exact instant those seeds germinate, you're not going to be able to take them off the napkin without damaging their fragile little roots.  There's no harm in just moving them to some soil with a small section of napkin though, so this way I can easily tear a corner of napkin off, trim off the excess, and put the scrap with the seed directly in some soil.

It also alleviates the problem I have with the current soil setup in that I can't see if anything is happening or not.  Considering I'm doing this half for the sake of the internet and half just to give me something to do over the winter, staring at a pot that refuses to boil for 2 weeks is getting to me.  Least this way I just look at it and see how everything is going.

We are currently scheduled for a fairly warm day on Sunday, so my hopes are to get the cabinet finished then (or at least all the woodwork) so I can disassemble it, bring it in, reassemble it, and get to work wiring everything up, especially now that my light came in.  Once thats ready, I can move my heating mat into it with these seeds and have everything tucked nicely out of the way.

Wednesday, December 17, 2014

I've Got Wood!

Okay, busy weekend meant I didn't get to get anything more built on Saturday.  Combination of running out of wood and other priorities.  Then it rained.  Considering I was kind of forced to leave the whole thing outside, I'm glad I got pressure treated lumber for this project.  Being rained on a time or two shouldn't actually hurt it.

Got more lumber, hinges, latches, and picked up a pair of huge 120mm case fans to put in the top.  I should now have everything I need to finish it as soon as I get the time and the weather cooperates.

And on a side note, I finally upgraded from my old phone (an ancient iPhone 3GS) to a new Galaxy Note 4, and the camera is just leaps and bounds better.  The pictures on here should start taking a drastic upswing in quality from now on.

Thursday, December 11, 2014

Big Box, Big... Big Box...

We had some warm weather sooner than expected, and I got out to take advantage of it.


I did re-level that shelf, just forgot to take a new picture.

The real problem is going to be getting this behemoth into my back room through the house by myself when its done!

That leaves for this weekend:

* Reinforce the base with crossbars to keep the walls from flexing.
* Add additional rails for raising/lowering the shelf.
* Drill/cut holes for the lights and fans.
* Make the front cabinet doors.
* Paint it.

When all the case work is done, then I'll bring it inside and get to actually wiring everything up.  Inside, where it's warm.

Tuesday, December 9, 2014

Awww Hell Nah...

Its winter, but its been unseasonably warm the past week or two.  Got me used to it being acceptable weather to work outside in.  It being winter, there's not a lot of daylight left after work to be outside working on large projects with skill saws and power drills, but I thought "Hey, I can at least get the sides assembled before it gets too dark.

Walked outside, set up the sawhorses, put the wood on there, and then realized "Crap its cold!".  Looked up, gray sky, a cold wet wind blowing, light fading fast.  Yup, its winter.

"Oh screw this, I'm going back inside and making cocoa."

We'll be back up in the mid 50's again this weekend, I'll do it then.  In the mean time, here's a picture of my dark chocolate cocoa with french vanilla marshmallows.

Stay warm, everybody!

Monday, December 8, 2014

Bigger on the Inside... and the Outside...

Went to Home Depot to buy lumber for the grow box.  I overdid it a bit, but thats okay.  My grow box is now going to be a 2 door grow cabinet.  Got some 1x8's and had them cut into 4' lengths, along with some 2x2's and 1x2's for the support structures.  To make sure I'm clear how I want it all to go, I fired up my favorite 3D software and did a quick CAD to scale.


This is the design I'm going for, all to scale.  Instead of pegs, I'll make internal ledges and have the bottom be a removable shelf I can slide in and out to adjust the distance from the lights fixed at the top.  Lights will be in minimal fixtures that will bet set into drilled holes in the top and then plugged into a power strip with built in timer at the top.  12' pots included for additional size reference.

Right now I have one 9w LED grow light coming in, with a pair of CFLs I'll put on the sides.  I'll see how that works out, how bright it all is, etc.  If need be I can add Y adapters to those sockets and take the shelf down a notch and have 6 CFLs in there.  Or if that LED is just "Oh my God, I looked directly into the light, I'M BLIND!" bright, I can order more to have all 3 sockets use them.

Not currently pictured are the CPU fans because I don't have them yet.  I want to get the big ones and have one on each end of the case blowing in, but gotta see what I can get my hands on easily first.

Sunday, December 7, 2014

Next Steps

While I wait for that seed to sprout and my brass nameplate to be engraved, I think I've decided that I want to make a full on grow box for it.  And if what I did for the container hasn't tipped you off yet, I tend to go big when it comes to projects.  The real trick will be getting all the materials for the build without making the cops think I'm trying to grow weed!

"No officer, I swear I'm not growing pot, I'm trying to grow a the world's hottest pepper!  In the middle of the winter!  For the internet!"

Anyway, I've got a decent quality LED grow light coming in from China, a 9w red/blue mixture deal, but I'm not 100% convinced that its going to be enough.  So, I'm planning on adding sockets for two CFLs as well.  Put all that in an enclosed box lined with aluminum foil for reflection, and I'm thinking that should be enough to get the job done.

If I use pegs, I can have a fixed top and then raise/lower the floor of the box to keep the plant as close to the lights as possible without burning it as it grows.  Then the only thing that would be left is to grab a CPU fan or two and rig them up to run off a wall wart.  I rig those to run off of battery packs all the time, so rigging one to a wall adapter should be a piece of cake.

In fact, I'm bored and there's nothing good on TV, I think I'll run out to a hardware store and pick up a few pieces!

Friday, December 5, 2014

Containment Status: 98%


And I think we're mostly done with the container, ladies and gentlemen.  Everything has dried and been sealed with a gloss enamel (including the moss), the facing has been decided on (ended up being obvious after I realized it had a facing that was more or less flat and attractive), and even the skull burial depth after realizing how much soil depth was available to work with.  This skull bonsai container is ready to rock!

I do have one final thing I want to do with it though.  There is a nice fairly flat overall area in the front at the bottom that would be perfect for a nameplate.  going to head over to the local plaque store and see how much it would cost me to get a nice looking brass nameplate with the name of the project and the type of pepper I'll be using to affix to the front.

In the mean time, enjoy this pencil sketch I found on the internet (no clue where it originated from) that shows the basic idea I'm going for.


Thursday, December 4, 2014

Better Living Through Better Moss

I was out hiking in my woods today after work since the weather is so nice, partly for the exercise and partly to gather raw materials for the bonsai.

See, I want to grow moss to put over the soil around the skull, and one of the best ways of doing that is with what the bonsai community calls "keto-tsuchi", or what we down here in the American south call "muck".  As you may have figured out from the name, its basically just smooth mud and, well, muck.  Lots of fine grain organic matter, clay, you know, the stuff that if you stepped in a big deep patch of it while out hiking it would suck the boot right off your foot.  Now luckily, I have several streams on my property which means I've got ample amounts of stream bottom silty muck for the taking.

To turn that into some proper bonsai keto, what I'd want to do is add some dried sphagnum moss to it, maybe a little perlite, basically turn it into something akin to concrete.

The reason I would want to do this is that a good bonsai soil mixture tends to be gritty and aerated, which is good for the tree.  A good moss likes a growing surface that is smooth and dense that retains water well without moving too much.  Pretty much the exact opposite of what the bonsai wants.  Now, given enough time a good moss can grow over a gritty surface, but its difficult and slow.

Thats where the muck comes in.  Mix up some muck and you can make a type of thin clay layer on top of the grittier soil that is water permeable that moss loves, without screwing up your soil underneath for the tree (or in this case pepper).

So, I went a hiking to see if I had some good stream bed silt I could harvest, and yup, found plenty of it as I knew I would.  But in addition to that, I found this...


Now normally the only mosses I see around here are... well I don't know the names of the various mosses out here.  Before I got into bonsai I never had a reason to differentiate between them.  Its mostly this:


and...


...this stuff.

That second one (which took me forever to find a picture of on the internet now that its too dark outside to just take a picture of whats growing in the driveway) is what I harvest some of last week to start growing, but its not really ideal for this project.

Then I found the patches of the fern like leafy stuff in the first picture.  This is the same stuff (or at least extremely similar) I bought  dried in a bag to decorate the sides of the pot with, and here's some good living colonies right in my own (extended and heavily wooded) back yard.

Needless to say, that is the perfect stuff, and I cut my hike short and ran home to grab a shovel and the nearest suitable lightweight transport container I could get my hands on.  Which turns out to be...


...the turkey roasting pan from Thanksgiving.

Dug up some of the muck dirt from the mostly dried up stream bed a dozen or two feet away, filled the roasting pan, and then harvested some chunks* of the moss to seed it with.

*Note: Be kind to mother nature, never harvest an entire outcropping of moss, just take some pieces from any given spot so that it can regenerate easily.

Got home, transferred to a better container (never use metal containers), poured some rain water in there to get it nice and moist, and set it under the carport where it would get partial shade but still have decent light.  With any luck, I'll not only have the muck to cover the top of the better bonsai soil with, but it'll already be covered in a layer of matching moss to the container.  Perfection!

(Side Note: I could probably take the dried moss I have, soak it in water, and have spread it out in the soil as well.  While that moss is dead, odds are its full of spores that would germinate fairly easily.)

This is the key to making really awesome stuff.  Just get the basic idea of what you want in your head, and then just walk around with your eyes open.  More often than not, the perfect things you would never have expected will just fall into your lap.

Burial Practices

Okay, the wood putty is still setting up.  Most of it is dry, but some of the really deep fill areas are still a little soft, so giving that some more time.

I was going to wait and do this in the finished container to give it a bit more context, but decided to do it now because I'm bored waiting for things to dry/sprout/etc.

The theme I've settled on is that this is going to be a deathly hot Carolina Reaper growing over a skull in a forest.  Thing is, is that skull just sitting on the surface, is it half buried, is it looking up towards the sky like the guy died on his back, or is it sitting upright like it was laid there, or some combination of the above?  Getting just the right position for the skull now is important, because it will determine how much of it is above the soil line and at what angle the pepper will need to be grown at.

So, without further ado,  here are the 5 positions I'm considering, as laid out in my currently vacant raised bed.


1) Sitting On Top
Pros: Gives maximum exposure to the skull, and maximum shapes and contours for the roots to flow over.  Also gives maximum height to the display aspects of the bonchi.

Cons: Little bit boring.  Theme is that this skull has been out there in the woods long enough for this plant to grow over it, and this looks like someone just sat it down yesterday.


2) Partially Buried
Pros: Gives a greater indication of age, because it looks like the skull has been sitting there long enough for dirt to start building up over it.

Cons: To keep the lower teeth showing, it requires the skull to be tilted back more.  I was leaning towards the plant coming out of one eye socket, but that style would look better if the face was more upright.


3) Half Buried - Upright
Pros: Gives the skull a more raw element, as it appears that the lower jaw is missing completely, which gives the impression that something has happened and the discarded skull is not anywhere near the rest of it's body.

Cons: Again, looks like its the top half of a skull just sitting on the surface.


4) Half Buried - Slanted
Pros: Combination of the look that it is a discarded upper skull, combined with the appearance that its been there for quite some time and the soil is building up around it.

Cons: Again, sloped face means having to move the plant higher up the forehead to give more room for the roots to show.


5) Mostly Buried
Pros: Greatest sense of age, as it appears the skull has not only been buried over time (or perhaps intentionally buried), but that the soil has washed away revealing it.  Also the best explanation as to why the plant is growing over it, the implication being that when the plant started it was in normal soil and only grew down as the skull below it slowly washed out of the ground.

Cons: This is the flattest of the designs, and will show the least amount of the root over rock style.

---

The verdict?  I don't know yet.  Aesthetically as far as the skull itself is considered, I like #2 and #5 the best.  I like the look of the lower jaw being partially buried but not completely missing.  Aesthetically as far as showing off the bonsai style of root over rock and making the plant more impressive?  Its #1 all the way I think.  Its the tallest, which means it has the most surface at the most interesting angles for the roots to cover.

I'll have to do this again once the container is finished and see if the container itself poses any limitations in what can be done, or if a synergy pops out that I'm currently overlooking.  Its going to be hard to find the perfect balance of theme/showmanship with the setup, and practical display of bonsai ability with this one.

Please feel free to leave your opinion on which you like most in the comments, and why.

Wednesday, December 3, 2014

Which End is the Front?

Playing around with the skull and the container now that I have it more or less finalized, and I realized something.  I've just been assuming one side was the "front".  Namely, this one:

Red arrow added for orientation purposes.

But then I started looking at it from other angles, and saw some interesting possibilities.


This one has been rotated 90 degrees clockwise, and its got an interesting combination of the higher built ridge (that forms a back collar in the original front assumption) being on the right, and the small jutting section being sent out towards the viewer.  Now, the build up on the right is interesting not only because it looks neat, but because I think I've about talked myself into trying the eye socket position for the plant, which would be on the left.  The higher bank on the right would help counterbalance the plant on the left.


Flip it around the other way, and the view isn't as dynamic, but it reads more like sitting on a log due to the grain in the jutting section that is now on the right, and there's something to be said for a skull sitting on a half rotten log.

But really, I think the choices are between the first two options, what I'm going to refer to for now as Portrait mode and Landscape mode.  Portrait mode is how I built it, with the back being higher than the front so that there's a lot of depth to it.  It clearly has a foreground, a midground, and a background.  Landscape mode though shows off more detail in the driftwood, and has a more dynamic foreground and midground, but no background at all.  But then, do we need a background?

I'm really thinking #2 may be the new front of this thing.  What do you think?  What makes a better bonsai display, portrait or landscape? Or the hidden third option which is half way in between the two, like I used for the blog header image?  Only problem there is that while it looks good in the picture, it feels kind of clunky in person.

And I'll Form the Head!

Finally had some dry weather to seal the bricking up and start final assembly of the container.


As you can see, I am using deck screws in the pre-existing holes in the driftwood (check back a few posts and you can see I got the pieces strung like a boa).  Forget glue, I'm holding the top of this thing down with good old fashioned steel.


Three deck screws in a triangle, each covered over with some wood putty that I can later paint to better match the wood make those nasty shiny screw heads go away.


And while I had the wood putty out, I went ahead and sealed up the inside gaps with it.  I'm not overly concerned about this part looking pretty since it will be below the soil line, it just has to be functional.  Once its thoroughly dried, I'll go over it with some sealant as well to make sure moist soil doesn't slowly rot it out.

That will be my third and final coat of sealant on this thing.  My general motto is that its organic wood next to moist soil, the ideal conditions for rot.  Better to have too much sealant (especially on the inside) and waste a layer than to not have enough and have all my hard work turn into a pile of mush in a couple years.


Since I was already working on the rest, I decided to go ahead and apply the moss to areas that didn't need any more attention.  Its pretty simple, just put some wood glue on the surface, and swirl it around with your finger to make a more or less even layer of glue, then push the moss into it.


I've got a lot of wet on here now between the moss glue and the putty, so its going to have to dry for at least a day or two before I touch it again.  Thats when I'll do final touch ups on the paint to hide the external putty, string out the moss a bit more where it looks too unnaturally clumpy, and then hit it all with one final layer of clear coat gloss enamel.

I did some test sprays of the enamel on some scrap moss and there was no visible change in it while it did stiffen it up quite a bit.  This is a good thing, as it will help make it nice and hard and hence more durable while still looking like natural growing moss.  Again, no point in doing it if its just going to fall apart in a couple years.

Then it'll be done, and I can fill it with soil and start working on skull positioning.  I'm debating on if I want the entire skull above the ground, or half bury the lower jaw so its mostly the top half of the skull showing.  I've kind of grown to like how that looks in some of the pictures I've taken for the blog here, so it'll be something to experiment with for a later post.